

- Home Ribbon Flex Cable for iPhone 5 Parts
- Category:iPhone 5 parts
- Model:
- View:2376
Detail
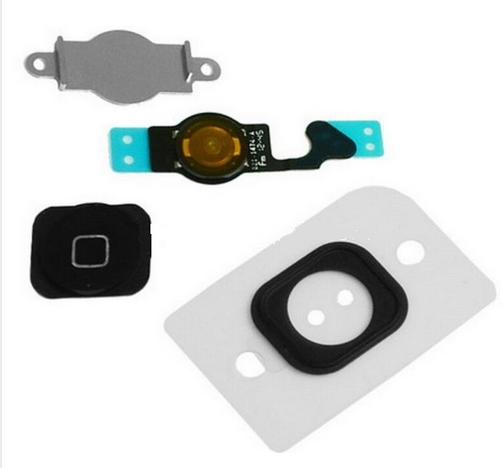
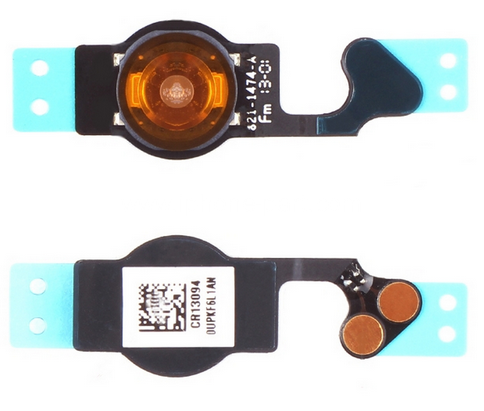
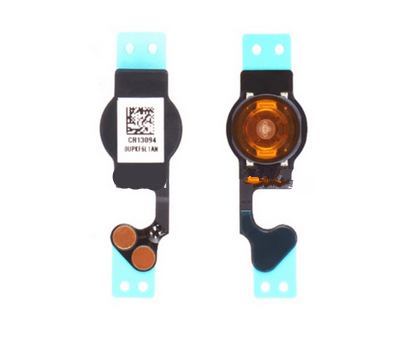
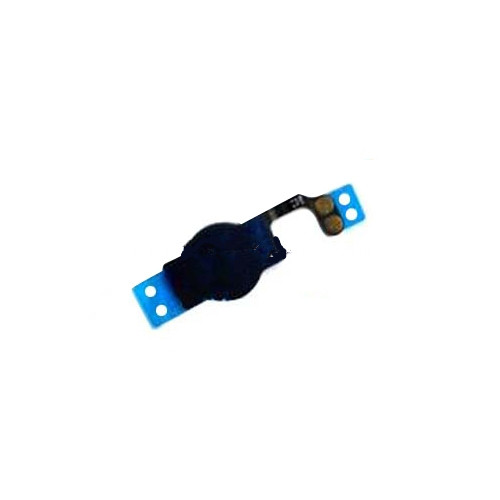
Home Ribbon Flex Cable for iPhone 5 Parts
This is the replacement Home flex cable for iPhone 5. It is connect the home button to motherboard. If this Ribbon flex is out of work, the home button will be useless. There fore, this is a very important repair parts for iPhone 5.
- Compatible model: suitable for iPhone 5
- Quality: original new
-
Weight: 15g
- Type: replacement parts
- Standard repair parts
- Home button pad is not included.

How to replace iPhone 5 home flex cable
Step 1.
If your display glass is cracked, keep further breakage contained and prevent bodily harm during your repair by taping the glass.
Lay overlapping strips of clear packing tape over the iPhone's display until the whole face is covered.
Step 2.
Remove the two 3.6 mm Pentalobe screws next to the Lightning connector.
Step 3.
Regardless of the tool you use, you need to be sure you pull up the entire display.
If the glass begins to separate from the plastic, as shown in the first image, slide a plastic opening tool between the plastic frame and the metal phone body to pry the metal clips out of the case.
Step 4.
Close the handle on the iSclack, opening the suction-cup jaws.
Place the bottom of your iPhone in between the suction cups, against the plastic depth gauge.
The top suction cup should rest just above the home button.
Open the handles to close the jaws of the iSclack. Center the suction cups and press them firmly onto the top and bottom of the iPhone.
Step 5.
Hold onto your iPhone securely and close the handle of the iSclack to separate the suction cups, pulling the front panel up from the rear case.
The iSclack is designed to safely open your iPhone just enough to separate the pieces, but not enough to damage the home button cable.
Peel the two suction cups off your iPhone.
Step 6.
Press a suction cup onto the screen, just above the home button.
Step 7.
While holding the iPhone down with one hand, pull up on the suction cup to slightly separate the front panel assembly from the rear case.
With a plastic opening tool, begin to gently pry the rear case down, away from the display assembly, while you pull up with the suction cup.
Step 8.
Continue to pry up around the sides of the front panel assembly, detaching the clips along the left and right side.
Step 9.
Once the clips have been released on the bottom and sides of the front panel assembly, pull the bottom of the assembly away from the rear case.
Open the display to about a 90º angle, and lean it against something to keep it propped up while you're working on the phone.
Add a rubber band to keep the display securely in place while you work. This prevents undue strain on the display cables.
Step 10.
Remove the following two screws securing the metal battery connector bracket to the logic board:
One 1.8 mm Phillips screw
One 1.6 mm Phillips screw
Step 11.
Remove the metal battery connector bracket from the iPhone.
Step 12.
Use a plastic opening tool to gently pry the battery connector up from its socket on the logic board.
Step 13.
Remove the following screws securing the front panel assembly cable bracket to the logic board:
Two 1.2 mm Phillips screws
One 1.6 mm Phillips screw
Step 14.
Lift the display cable bracket toward the battery to unhook it, and remove it from the iPhone.
Step 15.
Use a plastic opening tool to disconnect the three front panel assembly cables:
Front-facing camera and sensor cable
LCD cable
Digitizer cable
Step 16.
Remove the front panel assembly from the rear case.
Step 17.
Remove the two 1.3 mm Phillips #000 screws securing the home button bracket to the display assembly.
NOTE: When reinstalling the two 1.3 mm Phillips #000 screws, take care not to over tighten them as they can penetrate the other side of the display.
Step 18.
Use a plastic opening tool to pry the edge of the home button ribbon cable up from the display assembly.
Start on the right, at the area of the ribbon cable between the gold contact points, and work to the left.
Congratulations, you replaced the iPhone 5 home flex cable with new parts successfully.
Looking for ideal iPhone 5 Home Flex Manufacturer & supplier ? We has a wide selection at great prices to help you get creative. All the iPhone 5 Home Ribbon are quality guaranteed. We are China Origin Factory of iPhone 5 Home Flex Parts. If you have any question, please feel free to contact us.


 anandacn


